

Understanding the Roof Installation Process
Getting a new roof fitted is a significant home improvement. Whether your current roof has reached the end of its life or you’re upgrading to a better material, understanding what the process involves will help you feel confident and prepared from day one. Many homeowners feel uncertain about what to expect, from the initial survey…

Why you can trust our content
We understand that the roofing industry can be confusing, with plenty of outdated or misleading information. That’s why we rely only on trusted, proven sources to guide our advice and installations:


At a glance
Getting a new roof fitted is a significant home improvement. Whether your current roof has reached the end of its life or you’re upgrading to a better material, understanding what the process involves will help you feel confident and prepared from day one. Many homeowners feel uncertain about what to expect, from the initial survey right through to the final handover. This guide breaks it all down in plain language so you know exactly what’s happening at every stage.
If you’d like to discuss your project before committing to anything, you can request a free written quotation from Essex Roofing with no obligation and no hard sell.
What Happens During a Roof Survey?
Before any work begins, a qualified roofer will carry out a thorough survey of your property. This isn’t just a quick glance from the ground. A proper assessment involves inspecting the existing roof structure, checking for any underlying issues with the decking or timbers, and understanding the specific requirements of your home.
During the survey, your roofer will also discuss your material preferences, access requirements and any features that might affect the work, such as chimney stacks, skylights or solar panels. This information feeds directly into your quotation and helps ensure there are no surprises once the job gets underway.
Scaffolding and Site Preparation
Once you’ve accepted a quotation and a start date has been agreed, the first physical step is erecting scaffolding. This provides a safe working platform for the team and protects your property and any passers-by throughout the project.
At this stage, the surrounding area of your home will also be prepared. Garden furniture, vehicles and outdoor items close to the property should ideally be moved before the team arrives. Your roofer may also lay protective sheeting around the perimeter to catch any debris as the old roof is stripped back. Good preparation at this stage makes the entire process smoother and safer for everyone involved.
The Stripping and Structural Check Stage
With scaffolding in place, the existing roof covering is removed. This is where the roof installation process truly begins in earnest. Tiles, battens and felt are stripped back, and the underlying roof structure is carefully inspected.
This step is important because it can reveal issues that weren’t visible during the initial survey, such as rotten timbers or damaged rafters. Any structural work needed to bring the roof up to standard is carried out before the new covering is fitted. Skipping or rushing this stage is a common cause of problems down the line, so a diligent team will never cut corners here.
What Type of Roof Do You Have?
Please select the roof type of your property. This helps us determine the best installation method and equipment for your home.
 Flat Roof
 Pitched Roof
 Conservatory Roof
It just takes 60 Sec
And then you can book a free consultation
What Does the Installation Stage Involve?
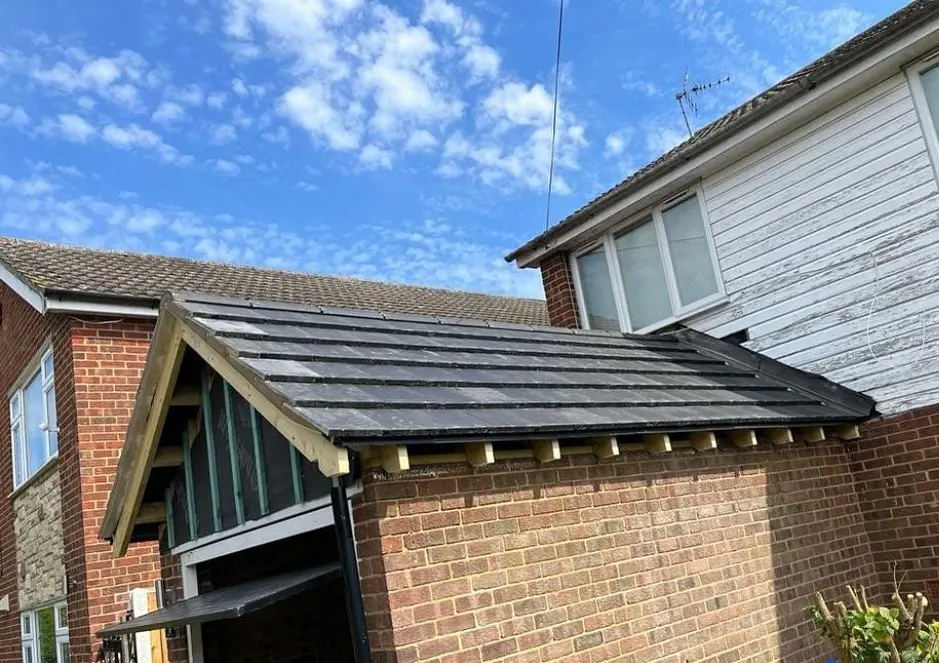
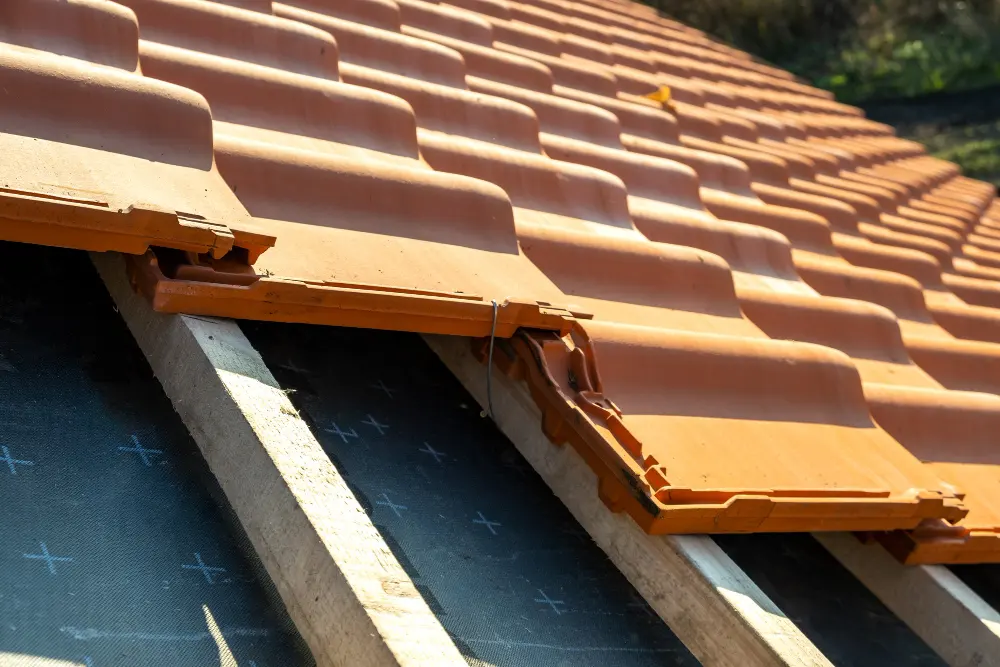
With the structure confirmed as sound, the new roof covering is fitted. For a pitched roof, this typically involves laying new breathable felt, fixing battens and then fitting tiles or slates in a precise, overlapping pattern to ensure full weather protection.
For flat roofs, the process differs depending on the material chosen. Systems such as EPDM or warm roof builds involve specialist layers designed to deliver long-term waterproofing and thermal performance. Here’s a general overview of the key stages involved across both roof types:
Finishing Works and Detailing
Once the main covering is in place, the team will move on to the finishing details. This includes fitting or re-bedding ridge tiles, pointing, installing or checking lead flashings around chimneys and abutments, and ensuring all verges and eaves are properly finished.
If your fascias, soffits or gutters are being replaced as part of the project, this work is typically completed at this stage too. These finishing elements are what give a roof its clean, professional appearance and they also play a practical role in channelling rainwater away from your property correctly.
Related articles
What Type of Roof Do You Have?
Please select the roof type of your property. This helps us determine the best installation method and equipment for your home.
Flat Roof
Pitched Roof
Conservatory Roof
At a glance
Getting a new roof fitted is a significant home improvement. Whether your current roof has reached the end of its life or you’re upgrading to a better material, understanding what the process involves will help you feel confident and prepared from day one. Many homeowners feel uncertain about what to expect, from the initial survey right through to the final handover. This guide breaks it all down in plain language so you know exactly what’s happening at every stage.
If you’d like to discuss your project before committing to anything, you can request a free written quotation from Essex Roofing with no obligation and no hard sell.
What Happens During a Roof Survey?
Before any work begins, a qualified roofer will carry out a thorough survey of your property. This isn’t just a quick glance from the ground. A proper assessment involves inspecting the existing roof structure, checking for any underlying issues with the decking or timbers, and understanding the specific requirements of your home.
During the survey, your roofer will also discuss your material preferences, access requirements and any features that might affect the work, such as chimney stacks, skylights or solar panels. This information feeds directly into your quotation and helps ensure there are no surprises once the job gets underway.
Scaffolding and Site Preparation
Once you’ve accepted a quotation and a start date has been agreed, the first physical step is erecting scaffolding. This provides a safe working platform for the team and protects your property and any passers-by throughout the project.
At this stage, the surrounding area of your home will also be prepared. Garden furniture, vehicles and outdoor items close to the property should ideally be moved before the team arrives. Your roofer may also lay protective sheeting around the perimeter to catch any debris as the old roof is stripped back. Good preparation at this stage makes the entire process smoother and safer for everyone involved.
The Stripping and Structural Check Stage
With scaffolding in place, the existing roof covering is removed. This is where the roof installation process truly begins in earnest. Tiles, battens and felt are stripped back, and the underlying roof structure is carefully inspected.
This step is important because it can reveal issues that weren’t visible during the initial survey, such as rotten timbers or damaged rafters. Any structural work needed to bring the roof up to standard is carried out before the new covering is fitted. Skipping or rushing this stage is a common cause of problems down the line, so a diligent team will never cut corners here.
What Type of Roof Do You Have?
Please select the roof type of your property. This helps us determine the best installation method and equipment for your home.
Flat Roof
Pitched Roof
Conservatory Roof
It just takes 60 Sec
And then you can book a free consultation
What Does the Installation Stage Involve?
With the structure confirmed as sound, the new roof covering is fitted. For a pitched roof, this typically involves laying new breathable felt, fixing battens and then fitting tiles or slates in a precise, overlapping pattern to ensure full weather protection.
For flat roofs, the process differs depending on the material chosen. Systems such as EPDM or warm roof builds involve specialist layers designed to deliver long-term waterproofing and thermal performance. Here’s a general overview of the key stages involved across both roof types:
Finishing Works and Detailing
Once the main covering is in place, the team will move on to the finishing details. This includes fitting or re-bedding ridge tiles, pointing, installing or checking lead flashings around chimneys and abutments, and ensuring all verges and eaves are properly finished.
If your fascias, soffits or gutters are being replaced as part of the project, this work is typically completed at this stage too. These finishing elements are what give a roof its clean, professional appearance and they also play a practical role in channelling rainwater away from your property correctly.
Related articles
What Type of Roof Do You Have?
Please select the roof type of your property. This helps us determine the best installation method and equipment for your home.
Flat Roof
Pitched Roof
Conservatory Roof